
Step 3: Ear impressions
For the purpose of this article, I asked my audiologist, Rolien Botha (you’ll find Rolien’s contact details below), to kindly take us through the process, and to point out the dos and don’ts for getting the best results.

Prior to getting your impressions done, the audiologist will check your ears for wax deposits and other blockages. Reliable impressions can only be taken if your ears are clean and clear of debris. On rare occasions, if you have too much build up, or are suffering from a cold or infection, it’s better to wait for your ears to clear up before proceeding.
Assuming your ears are clear, the audiologist will start by mixing liquid silicone and a hardening reactant inside a long syringe tube. The reactant bonds with the silicone, causing it to harden. Before injecting the mixture into your ear canal, a small foam ball attached to a string is carefully inserted in each ear, creating a stopper for the silicone to prevent it from getting anywhere near your eardrum.
According to Rolien, some people are concerned that the silicone goes too deep, but there’s at least a centimetre’s gap between the foam and your eardrum. At no point, she says, is there any danger of the silicone coming anywhere near the most sensitive parts of your ear.
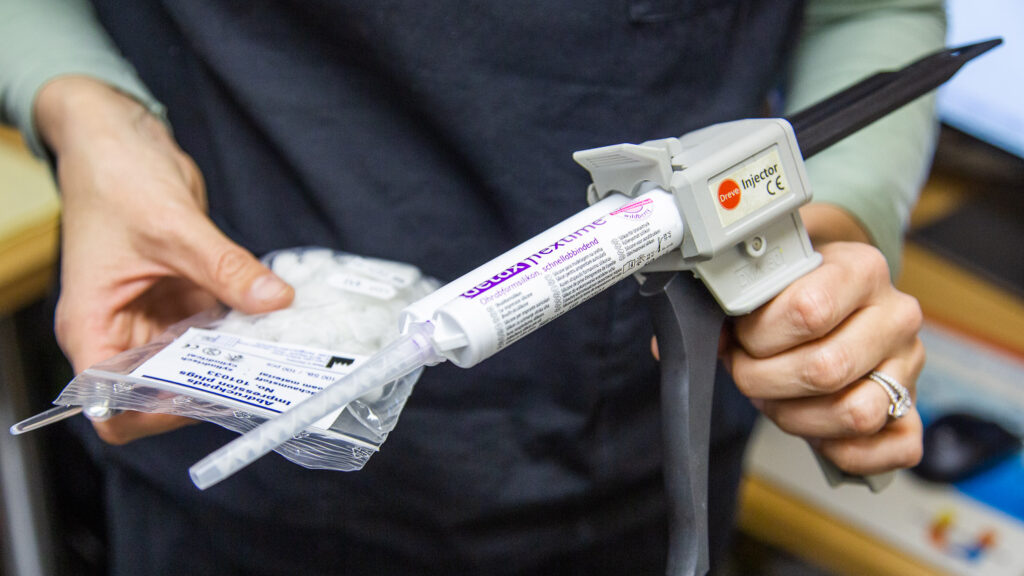
You’re going to feel a slightly wet sensation as the silicone mix is slowly injected through the tube into each ear. Depending on your ear anatomy, this will might be disconcerting at first, but it shouldn’t be uncomfortable. If you feel any pain whatsoever, tell your audiologist immediately. Moreover, your audiologist should be able to tell if your ear canals are too narrow for the silicone moulds to set. If that’s the case, speak to your CIEM company about alternative options.
The audiologist will ask you to keep still, and then insert a bite block (or, in my case, ask you to use two fingers), between your teeth, gently biting down so the impressions are taken with your mouth slightly ajar. This is a very important step, as it prevents CIEMs from losing the seal when you yawn or eat while the earpieces are inserted.
After about a few minutes minutes you’ll be able to remove the bite block, and the audiologist will periodically check the hardness of the silicone by gently pressing on the mould. The setting process takes anywhere from three to five minutes, during which you might hear some popping sounds as the air bubbles trapped in the mixture get expelled by the reactant.
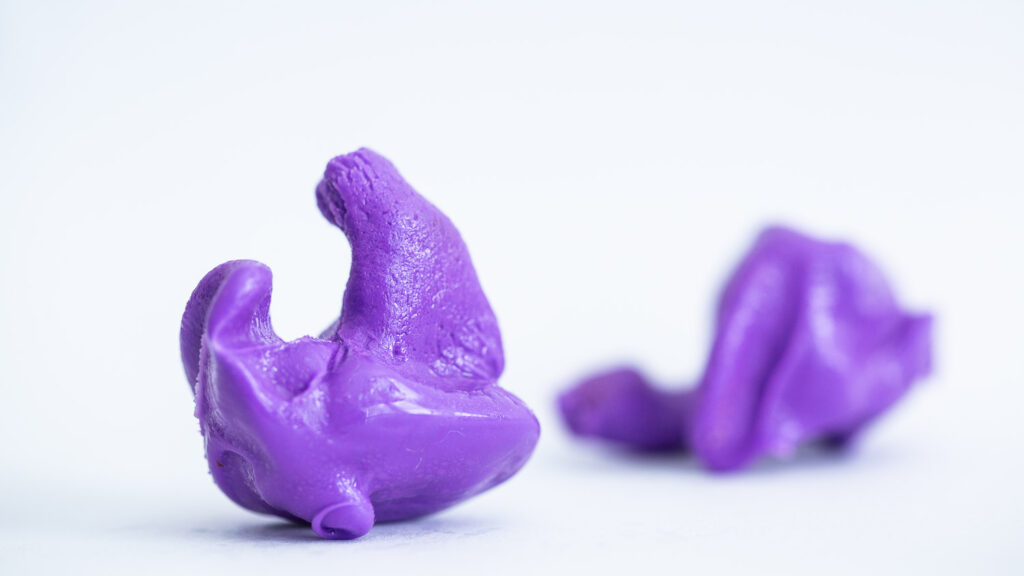
When the moulds are set, the audiologist will use the string (now dangling from your ears) to gently loosen and pull the hardened silicone out from each ear. If all went well, the result will look something like this:
In some parts of the world, you can avoid all of the above by visiting an audiologist that uses one of the new generation digital ear scanners. These literally take a ‘digital 3D mould’ of your ears, creating the digital files CIEM makers use to ‘print’ your custom earpieces. This service may be more expensive than regular impressions because of the expensive technology used, but in general, you shouldn’t have to pay more than $50 – $100 to have a set of ear impressions, physical or digital, professionally made.


2 Responses
Hi. I’m from head-fi and looking for nice CIEM as well to match with SP3000. Looking for warm, fun to listen one.
Very interesting indeed.